The following article will discuss how to remove drain plugs, knock sensors and a transmission cooler plug for Marine Power engines. * Doing this procedure drains water from the engine block and heater hoses which prevents water from freezing in the engine block during the winter months. Not removing water from the engine block could possibly crack the engine block.
If you are not comfortable with using this article as a “quick winterization” guide please take your Tigé to your nearest Tigé dealer. Not winterizing your boat properly could severly damage your engine.
The pictures below were taken from a Z1, RZ2 and 22Ve however the same should apply for recent Marine Power engines. Thank you for the members who contributed the images.
*Disclaimer: The following instructions are provided as a guide only. By following the instructions in this article, you are doing so at your own risk. TigéOwners.com, Tigé and the author of this article will not be held responsible for any damage that may occur to you or your boat as a result of the steps below.
* Note - I refer to this guide as a “quick winterization” as this only refers to draining the water from the engine. Some dealers or individuals prefer to fog the engine, add ant-freeze, remove and charge the batteries and put Stabil in the gas. I personally use this method since I take my boat out a few times during the winter months.
Tools Needed:
Time Involved :
20-30 Minutes
Step 1.
Removing drain plugs.
As illustrated in the picture below Marine Power engines have a total of 2 drain plugs (blue or silver colored) , 2 engine block plugs (knock sensors) and 1 transmission cooler plug. A total of 5 plugs will need to be removed.

Step 2.
Starting on the port side unscrew the blue or silver drain plug. It does not matter which side you start on.

Step 3.
Next remove the connectors that are connected to the knock sensors. These just “snap” off. To remove them use your thumb and press down on the connector head then pull straight back. In the picture below this is the “white” connector attached to the knock sensor.


Step 4.
Use a 3/4” wrench and unscrew the knock sensor plug. In this case a short 3/4” wrench is best since it’s a tight fit.

Step 5.
Moving on to the starboard side, repeat steps 2, 3 and 4.
Step 6.
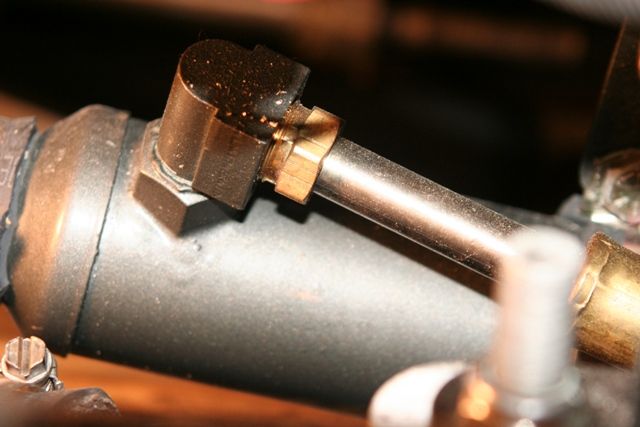
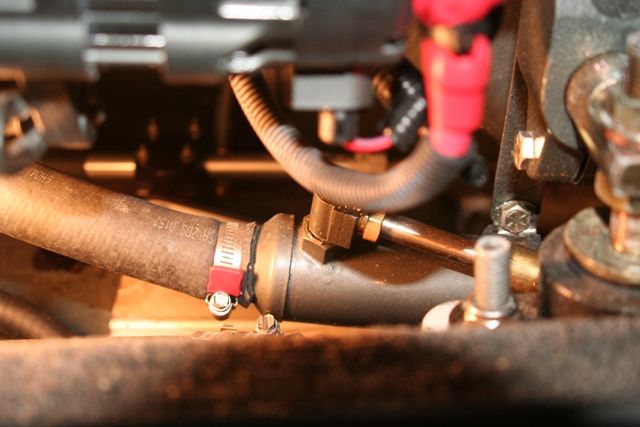
On the starboard side, locate and remove the transmission cooler plug. The transmission cooler looks like a small can and is located towards the bottom of the bilge near the back of the engine. There is a hose connected to it. Use a 7/16” wrench to remove this plug. The plug is located between the transmission cooler and hose. It is the hose that goes toward the boat, not the rear. The plug faces directly down towards the bilge. You can try to "feel" for the plug before you get your wrench in there. Getting your hand and wrench in there is a tight fit so take your time. Some members also find it easier to just remove the hose clamp that is attached to the transmission cooler (see the picture below). This method works just as well.


If you do not have a heater you can skip this step and call it a day as this is the last step of the winterization process.
Step 7.
Removing the heater hoses and drain the water from the heater core.
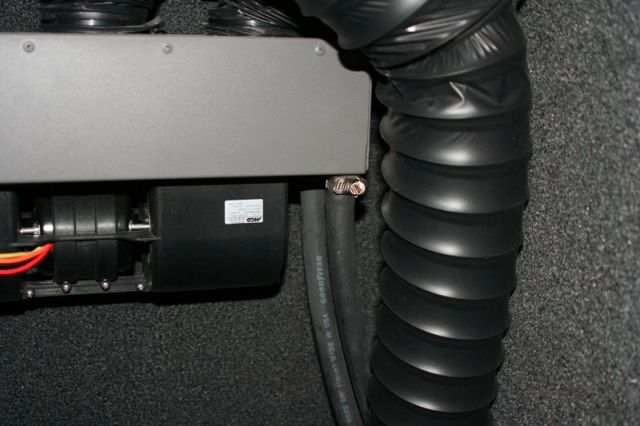
Heaters are typically located in the starboard bow storage (in front of drivers side).
Remove the two screw clamps with a screw driver and pull heater hoses off spouts.

Step 8.
Blow compressed air through both hoses. I use my mouth (dont worry its not gonna kill you). You should blow all the water through until you no longer have pressure and can hear the water gurgling down the hoses.
Step 9.
Blow compressed air through the heater spouts. These are the copper tipped pipes. I use a 2 ft spare heater hose that I connect to the spout. You could also use something similar such as a garden hose as long as there is a snug fit. Once attached I blow any additional water out of the heater core. Do this for both spouts. It is possible that you may not need to blow air through the heater core since there is not a lot of water but I like to for peace of mind.

Step 10.
Open up a beer and sit back and relax as you have just finished a quick winterization.
To “summerize” simply reconnect everything you removed.
If you are not comfortable with using this article as a “quick winterization” guide please take your Tigé to your nearest Tigé dealer. Not winterizing your boat properly could severly damage your engine.
The pictures below were taken from a Z1, RZ2 and 22Ve however the same should apply for recent Marine Power engines. Thank you for the members who contributed the images.
*Disclaimer: The following instructions are provided as a guide only. By following the instructions in this article, you are doing so at your own risk. TigéOwners.com, Tigé and the author of this article will not be held responsible for any damage that may occur to you or your boat as a result of the steps below.
* Note - I refer to this guide as a “quick winterization” as this only refers to draining the water from the engine. Some dealers or individuals prefer to fog the engine, add ant-freeze, remove and charge the batteries and put Stabil in the gas. I personally use this method since I take my boat out a few times during the winter months.
Tools Needed:
- 3/4 Wrench
- 7/16 Wrench
- Flat head screw driver
- Heater hose or something similar (old garden hose) (not required)
Time Involved :
20-30 Minutes
Step 1.
Removing drain plugs.
As illustrated in the picture below Marine Power engines have a total of 2 drain plugs (blue or silver colored) , 2 engine block plugs (knock sensors) and 1 transmission cooler plug. A total of 5 plugs will need to be removed.
Step 2.
Starting on the port side unscrew the blue or silver drain plug. It does not matter which side you start on.

Step 3.
Next remove the connectors that are connected to the knock sensors. These just “snap” off. To remove them use your thumb and press down on the connector head then pull straight back. In the picture below this is the “white” connector attached to the knock sensor.
Step 4.
Use a 3/4” wrench and unscrew the knock sensor plug. In this case a short 3/4” wrench is best since it’s a tight fit.
Step 5.
Moving on to the starboard side, repeat steps 2, 3 and 4.
Step 6.
On the starboard side, locate and remove the transmission cooler plug. The transmission cooler looks like a small can and is located towards the bottom of the bilge near the back of the engine. There is a hose connected to it. Use a 7/16” wrench to remove this plug. The plug is located between the transmission cooler and hose. It is the hose that goes toward the boat, not the rear. The plug faces directly down towards the bilge. You can try to "feel" for the plug before you get your wrench in there. Getting your hand and wrench in there is a tight fit so take your time. Some members also find it easier to just remove the hose clamp that is attached to the transmission cooler (see the picture below). This method works just as well.


If you do not have a heater you can skip this step and call it a day as this is the last step of the winterization process.
Step 7.
Removing the heater hoses and drain the water from the heater core.
Heaters are typically located in the starboard bow storage (in front of drivers side).
Remove the two screw clamps with a screw driver and pull heater hoses off spouts.

Step 8.
Blow compressed air through both hoses. I use my mouth (dont worry its not gonna kill you). You should blow all the water through until you no longer have pressure and can hear the water gurgling down the hoses.
Step 9.
Blow compressed air through the heater spouts. These are the copper tipped pipes. I use a 2 ft spare heater hose that I connect to the spout. You could also use something similar such as a garden hose as long as there is a snug fit. Once attached I blow any additional water out of the heater core. Do this for both spouts. It is possible that you may not need to blow air through the heater core since there is not a lot of water but I like to for peace of mind.

Step 10.
Open up a beer and sit back and relax as you have just finished a quick winterization.
To “summerize” simply reconnect everything you removed.


Comment