I completed most of my version of this install late last season, but am just now getting around to sharing the details... I like pictures, so there are lots to follow!
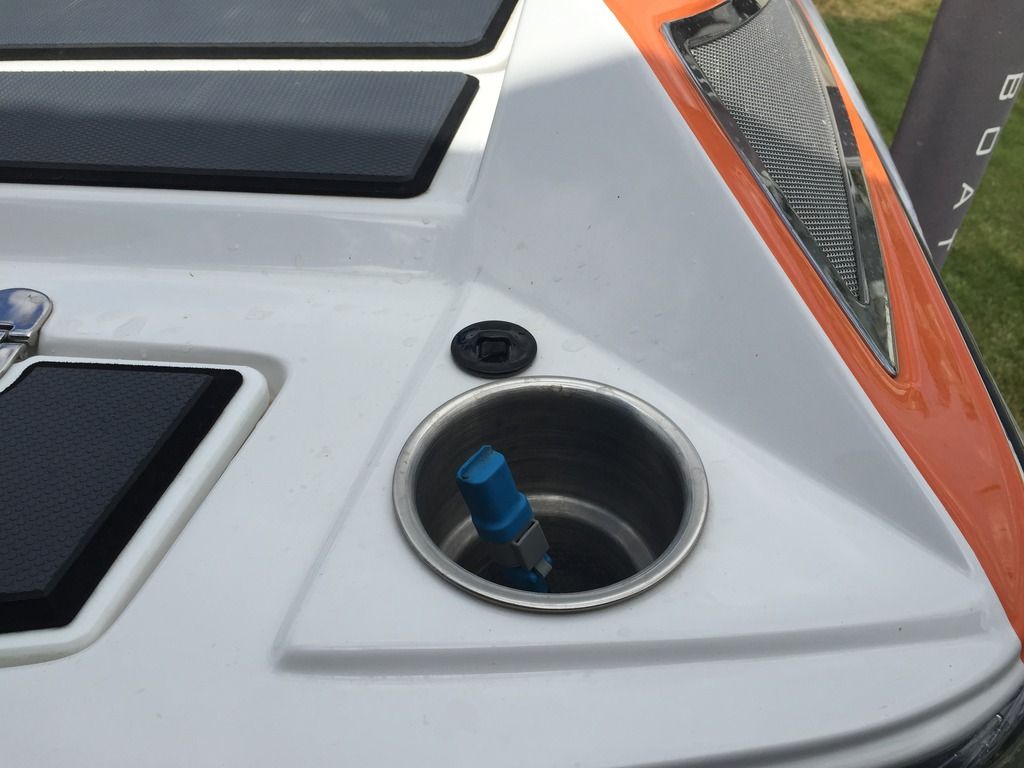
What I wanted out of my install was a plug and play solution that could be easily swapped from side to side and that kept all of the necessary cabling to a minimum, hidden and somewhat permanently installed. Further, I wanted to do it in such a way that there were no potential issues with the camera. For cable I chose a 4 conductor, 18ga tinned Belden. Starting at each rear cup holder, cable was run, spliced together and then ran to under the helm. At that point, 1 pair of conductors was terminated with an rca plug for the Viper and the other pair to 12V +/-. The cable in the cup rear cup holders is terminated with automotive 4-pole connectors.
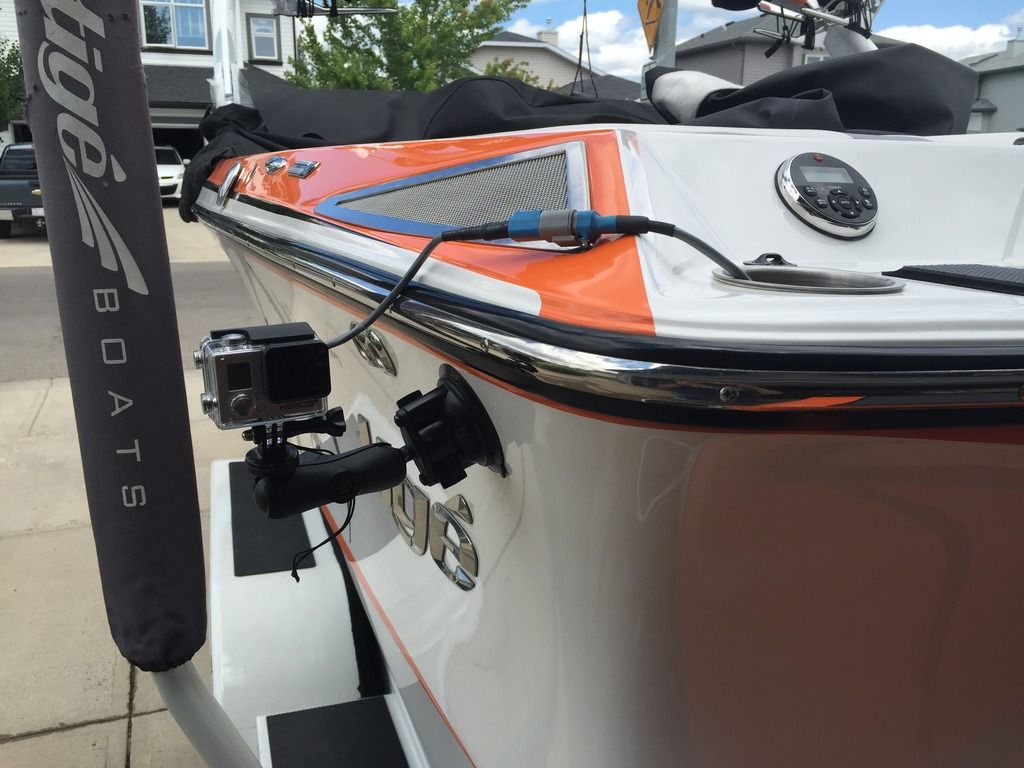
Port

Starboard
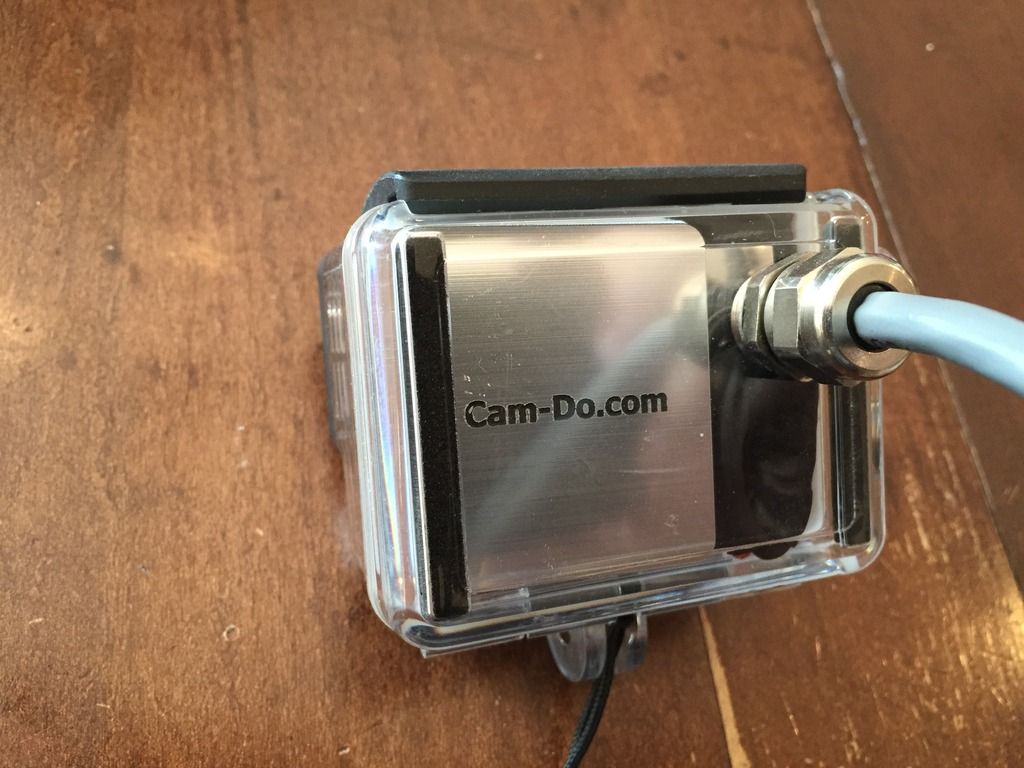
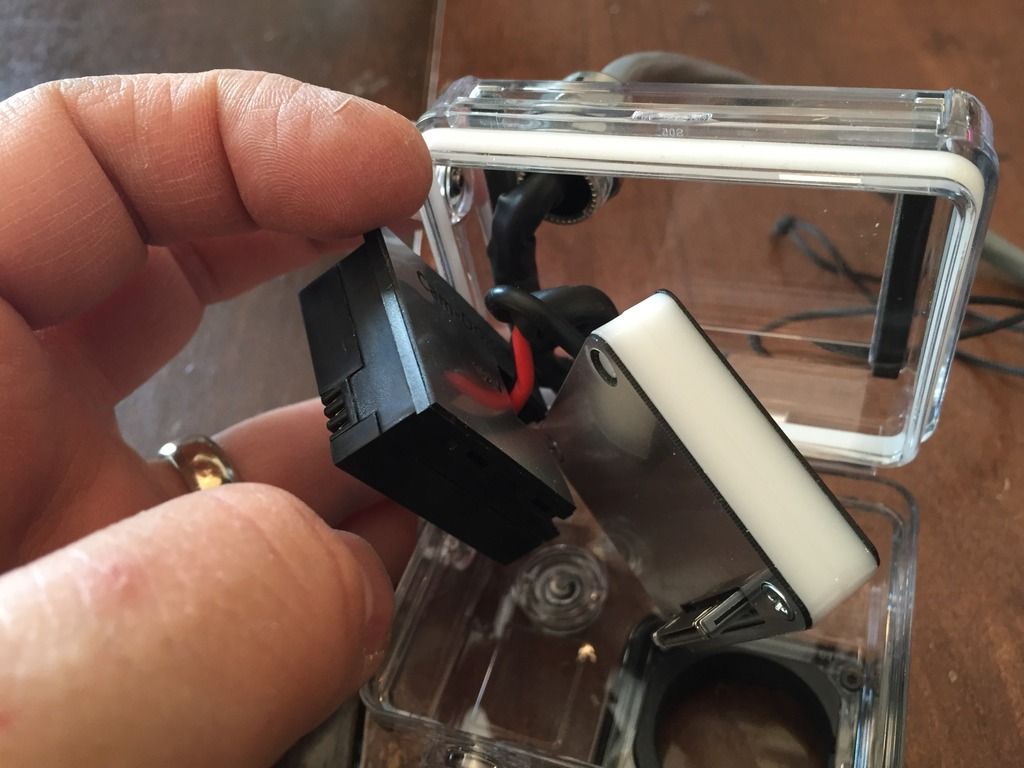
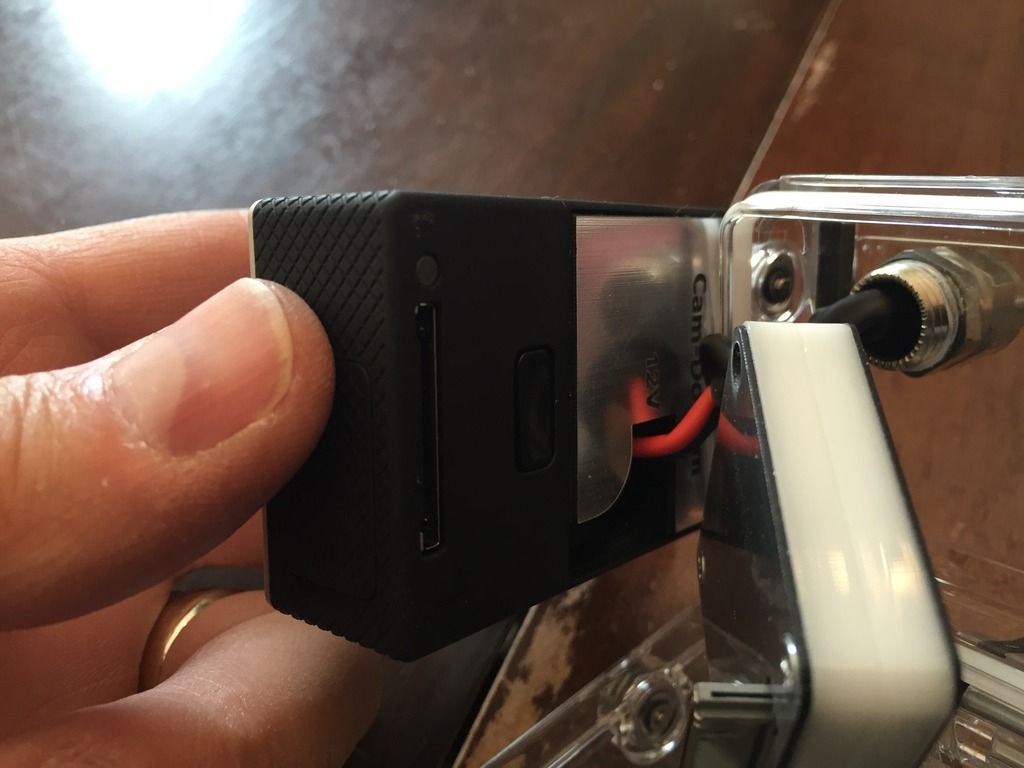
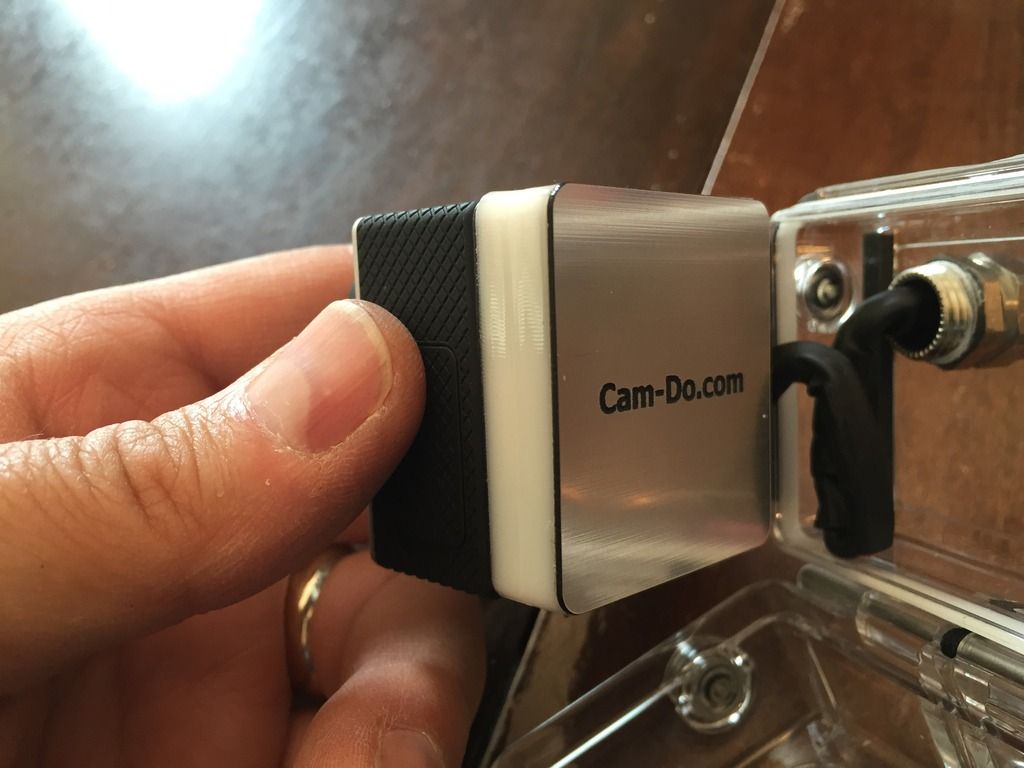
For the camera, I went with a solution from CamDo.com. Instead of taking video from the usb port at the side, I'm taking it from the multi-port at the rear of the camera through the CamDo adapter. For power, I went again with a CamDo adapter that transforms the 12V to the required 5V. This was advised as a safer solution as it eliminates overheating from charging and alleviates potential crashes from leaving the battery in and charging through the usb. Both video and power are spliced into a short Belden lead and terminated in an automotive plug. For the GoPro housing, I purchased the extended back door, drilled an appropriate hole and ran the Belden through a liquid tight fitting. I tested everything underwater (minus the camera), and it has zero leakage.
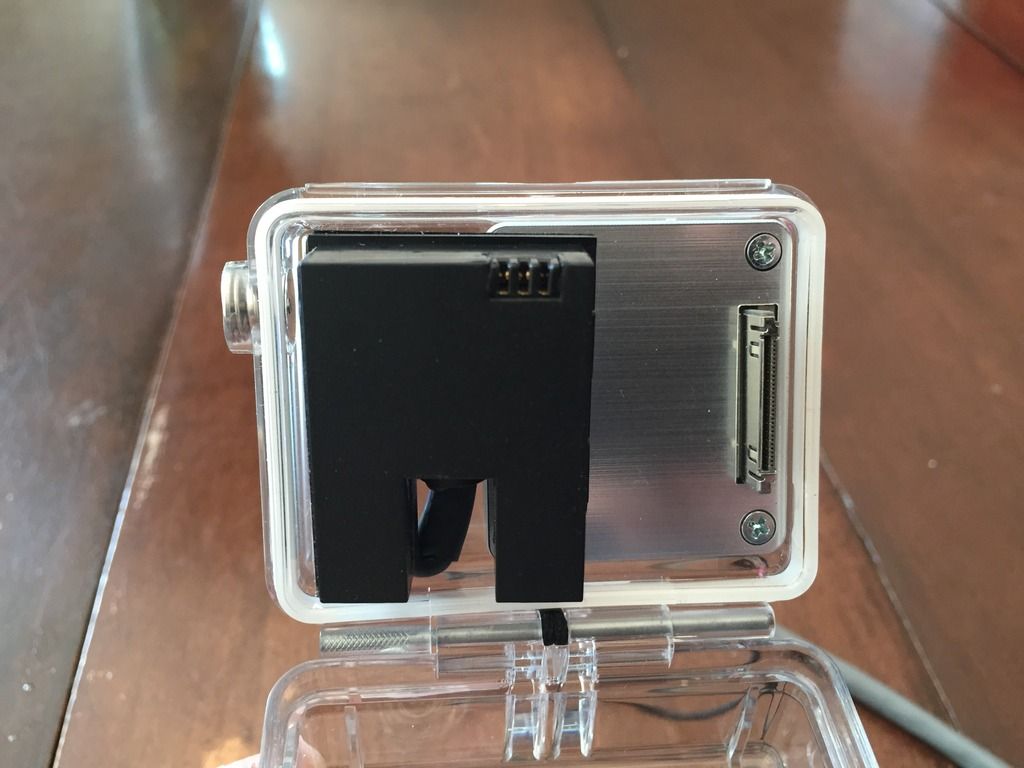
Assembled from back
Assembled from side
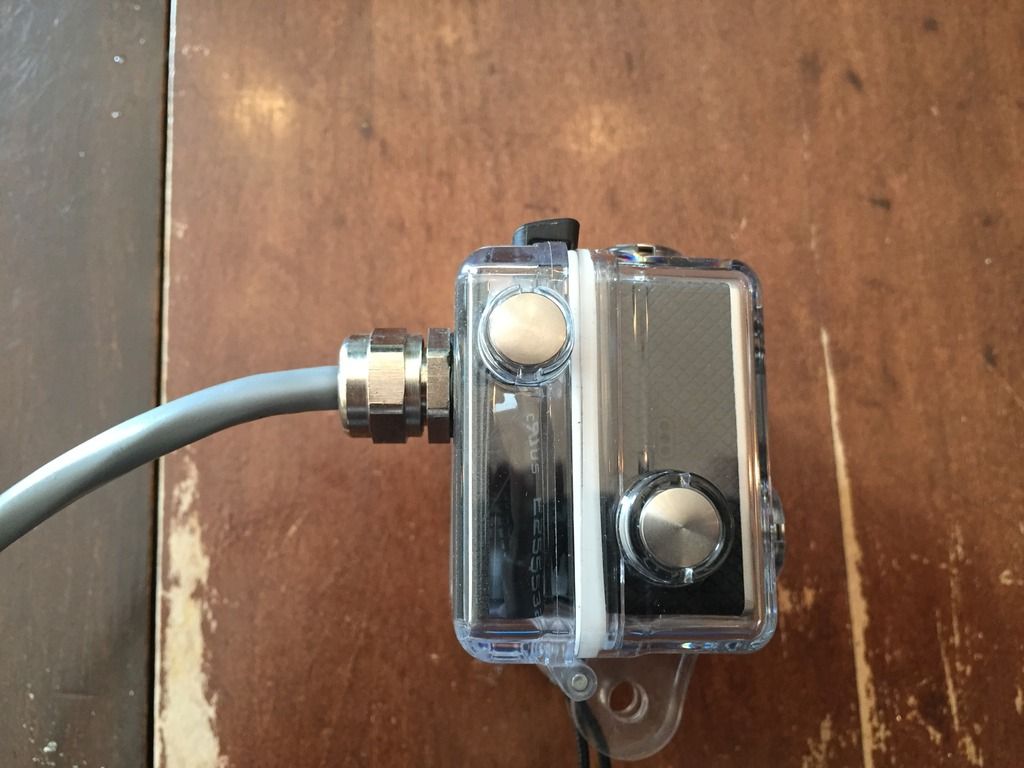
Power and video adapters
In action, I'm able to mount the camera to either side of the boat almost anywhere along the rear or sides as I left extra cable hat can be pulled or retracted from the cup holder holes. The mount is a RAM suction mount. It is very reliable, but I still use a tether at times, just to be sure.
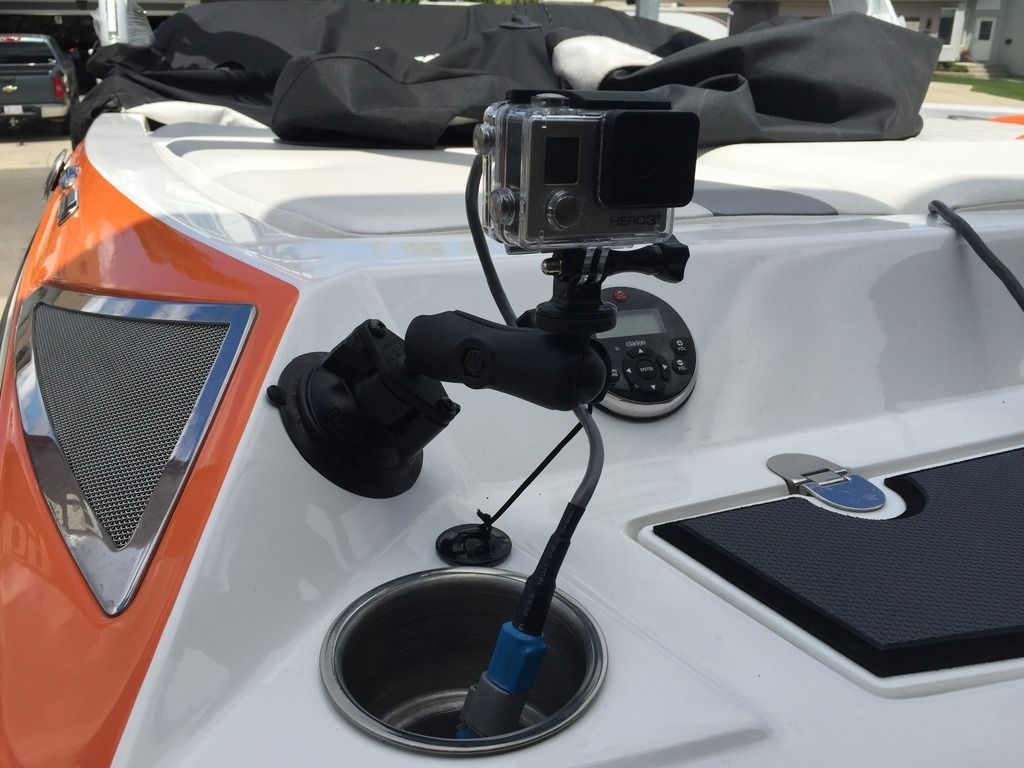
So far, this has worked flawlessly with clean video to the Tige Touch and no need to ever worry about batteries in the camera. I also have the GoPro wifi remote, so I'm able to start and stop the camera from the helm.
What I wanted out of my install was a plug and play solution that could be easily swapped from side to side and that kept all of the necessary cabling to a minimum, hidden and somewhat permanently installed. Further, I wanted to do it in such a way that there were no potential issues with the camera. For cable I chose a 4 conductor, 18ga tinned Belden. Starting at each rear cup holder, cable was run, spliced together and then ran to under the helm. At that point, 1 pair of conductors was terminated with an rca plug for the Viper and the other pair to 12V +/-. The cable in the cup rear cup holders is terminated with automotive 4-pole connectors.
Port
Starboard
For the camera, I went with a solution from CamDo.com. Instead of taking video from the usb port at the side, I'm taking it from the multi-port at the rear of the camera through the CamDo adapter. For power, I went again with a CamDo adapter that transforms the 12V to the required 5V. This was advised as a safer solution as it eliminates overheating from charging and alleviates potential crashes from leaving the battery in and charging through the usb. Both video and power are spliced into a short Belden lead and terminated in an automotive plug. For the GoPro housing, I purchased the extended back door, drilled an appropriate hole and ran the Belden through a liquid tight fitting. I tested everything underwater (minus the camera), and it has zero leakage.
Assembled from back
Assembled from side
Power and video adapters
In action, I'm able to mount the camera to either side of the boat almost anywhere along the rear or sides as I left extra cable hat can be pulled or retracted from the cup holder holes. The mount is a RAM suction mount. It is very reliable, but I still use a tether at times, just to be sure.
So far, this has worked flawlessly with clean video to the Tige Touch and no need to ever worry about batteries in the camera. I also have the GoPro wifi remote, so I'm able to start and stop the camera from the helm.
Comment