As noted elsewhere, last Fall I upgraded to the "wet" style of PSS Shaft Seal during my warranty transmission swap. It was late in the season so we didn't put the boat back in the water - I just winterized it and tucked it away. This meant the wet shaft seal plumbing had to be installed this Spring, before the boat could be launched.
Reviewing briefly: I ordered PCM's official kit for this purpose (their part number RK024228, "Shaft Seal Suppply Kit", note the extra "p") figuring it would be a good idea to do it the way the factory does. When the kit arrived, however, it was immediately obvious that it wouldn't work. I never did get an explanation from PCM (though they were polite about it). Finally, I discovered that PSS - the makers of the shaft seals - have their own kits available for this purpose. "We got tired of all the phone calls." I ordered that kit yesterday and it arrived today.
Here are the contents of the PSS kit:

The kit is complete, even including the hose. They use 3/8ths fuel tank vapor hose, which is a good balance of toughness and flexibility. Flexibility is important because the hose must not put any side load on the carbon ring of the shaft seal - doing so could force it out of alignment.
They also supply a VERY stout fitting, comprised of (for my engine) a one inch brass fitting with a threaded side port into which is screwed a 3/8ths brass hose nipple. Appropriately sized hose clamps complete the package.
Here is a closeup of the PSS fitting along with the pieces in the PCM kit:
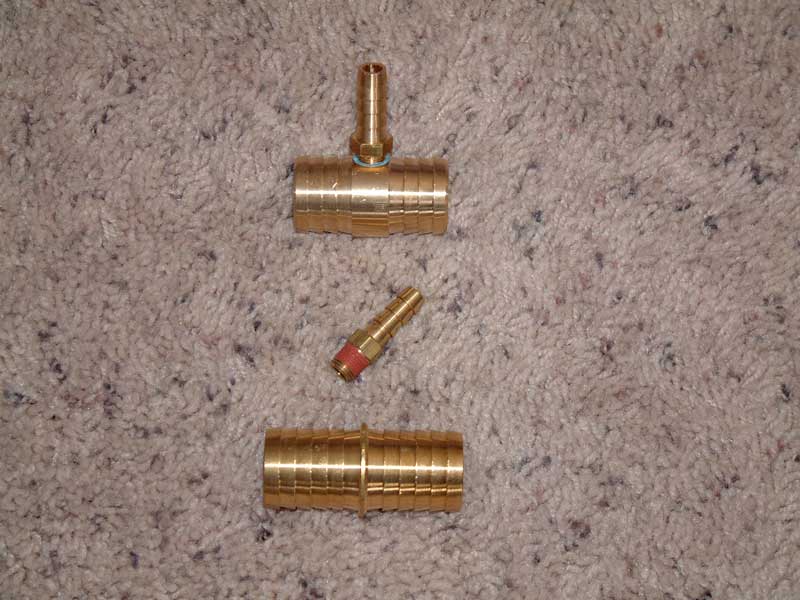
At top is the PSS fitting. The lower two parts are the sum total of what was in the plastic bagged PCM kit. Yes, there's a 3/8ths hose nipple. There's also a nice one inch hose coupler. What's missing is any way to connect them together! The coupler does not have a threaded hole on its side like you'd expect. It's simply impossible to use this kit to take water off of an existing hose. Weird, eh?
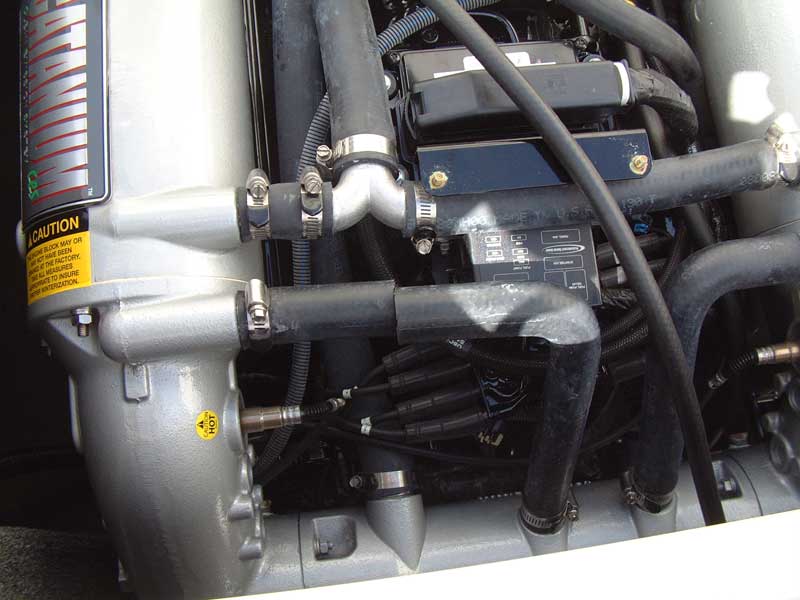
On to the installation. First step is to cut a hose into which the fitting will be installed. The PCM engine manual, and their telephone support staff, specifically recommend either of the two "dump" hoses on my CAT exhaust system. I chose the starboard hose because it was longer on its horizontal run, and because this would allow the hose to curve more gently around as it worked its way down toward the shaft seal.
Here is the hose, freshly cut:
I removed a portion of hose roughly equal to the width of the exposed fitting, then installed it using the supplied clamps:
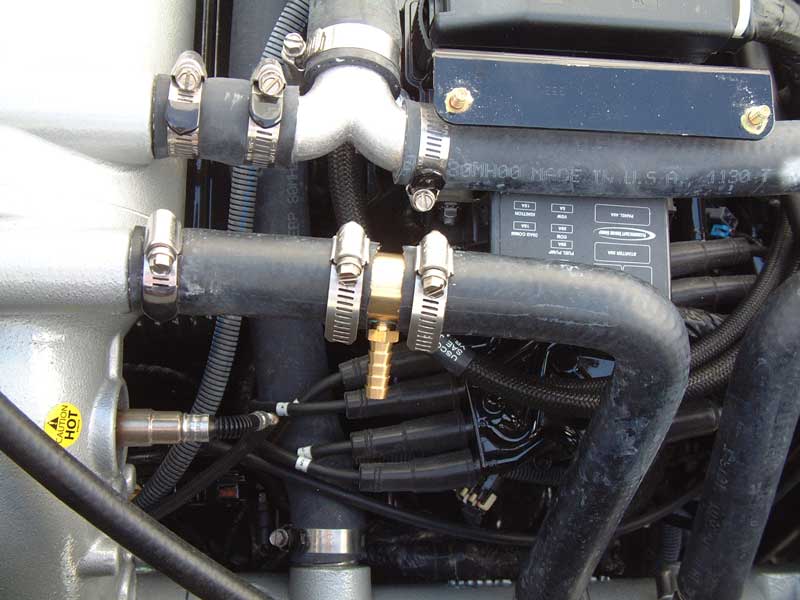
Next, the shaft seal hose was installed. Here's a "front" view:
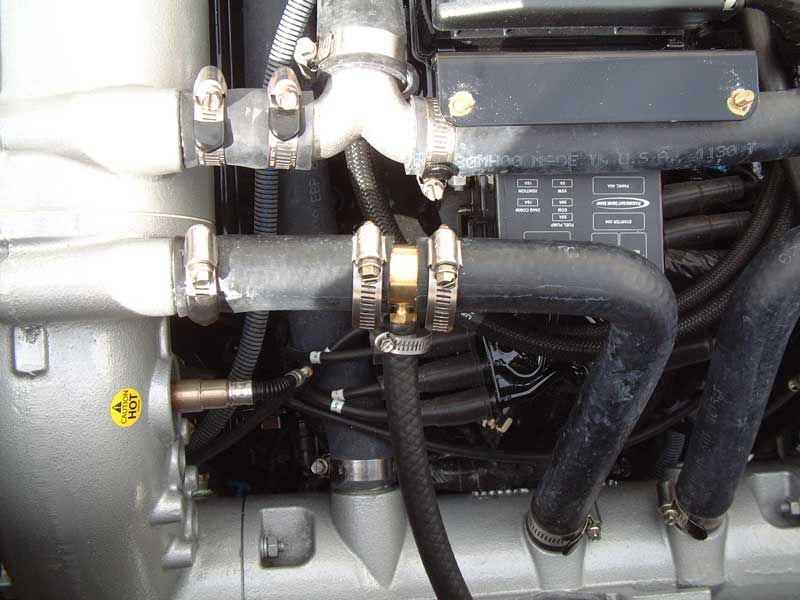
...and here's a "top" view showing how the hose gently curves down toward the shaft seal:
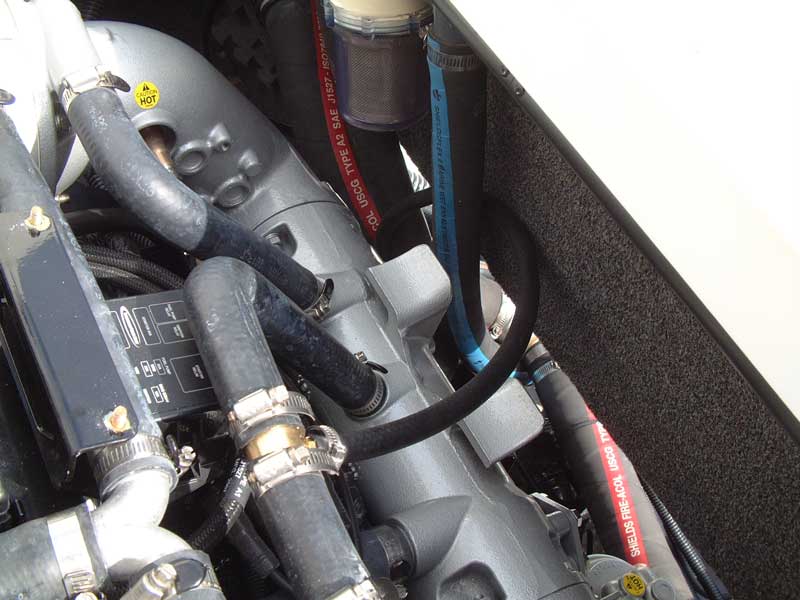
Unfortunately, there was no way to get a camera down under the engine to show the hose connection to the shaft seal's carbon ring. I could barely get a view of it with one eye, and most of the work under there was done "blind" and one-handed. I'm really glad I had the shop tech install the seal. Here's what it looks like by itself:

(The one that Tige uses at the factory looks exactly the same except that it doesn't have the nylon hose nipple. That "dry" version relies on water under the boat to keep the seal lubed and cooled. However, PSS specifically recommends the wet version for boats that go on plane or that can exceed 12 knots, because in these conditions a vacuum develops under the hull around the propshaft which creates an air pocket - thus starving the shaft seal for water. The correct solution is to plumb water to the seal so that no matter what is going on under the hull, the seal always has water.)
Finally, I dewinterized the engine and started it up. When I looked under the hull, the water flowing from the shaft seal was clearly visible:
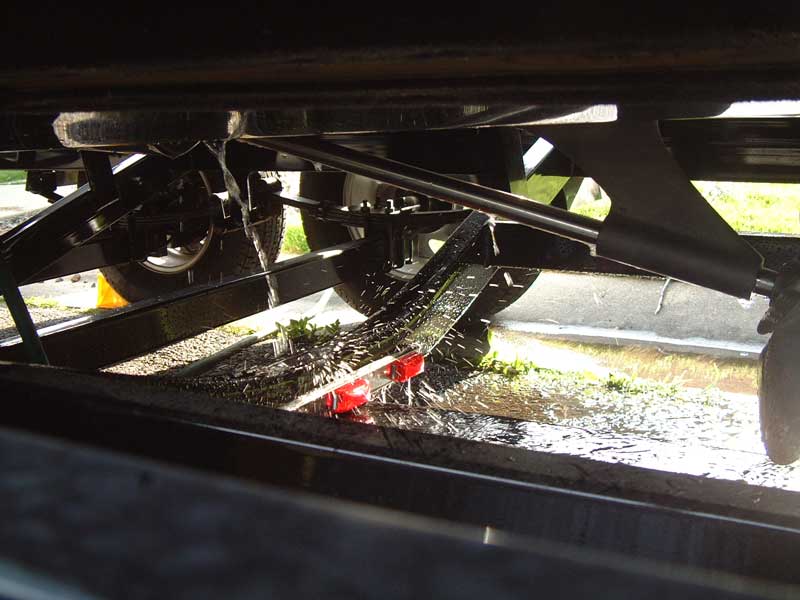
...and, surprisingly, cool to the touch even after the engine temp went over 100F. I felt the "dump" hoses where PCM recommends the water be taken and they were cool. The other exhaust cooling hoses were nice and warm, so I know water was flowing around properly.
Hopefully this will be the end of the "shaft seal noise" that we experienced last year:
Click here to listen
Hope this helps someone... thanks!
Reviewing briefly: I ordered PCM's official kit for this purpose (their part number RK024228, "Shaft Seal Suppply Kit", note the extra "p") figuring it would be a good idea to do it the way the factory does. When the kit arrived, however, it was immediately obvious that it wouldn't work. I never did get an explanation from PCM (though they were polite about it). Finally, I discovered that PSS - the makers of the shaft seals - have their own kits available for this purpose. "We got tired of all the phone calls." I ordered that kit yesterday and it arrived today.
Here are the contents of the PSS kit:

The kit is complete, even including the hose. They use 3/8ths fuel tank vapor hose, which is a good balance of toughness and flexibility. Flexibility is important because the hose must not put any side load on the carbon ring of the shaft seal - doing so could force it out of alignment.
They also supply a VERY stout fitting, comprised of (for my engine) a one inch brass fitting with a threaded side port into which is screwed a 3/8ths brass hose nipple. Appropriately sized hose clamps complete the package.
Here is a closeup of the PSS fitting along with the pieces in the PCM kit:

At top is the PSS fitting. The lower two parts are the sum total of what was in the plastic bagged PCM kit. Yes, there's a 3/8ths hose nipple. There's also a nice one inch hose coupler. What's missing is any way to connect them together! The coupler does not have a threaded hole on its side like you'd expect. It's simply impossible to use this kit to take water off of an existing hose. Weird, eh?

On to the installation. First step is to cut a hose into which the fitting will be installed. The PCM engine manual, and their telephone support staff, specifically recommend either of the two "dump" hoses on my CAT exhaust system. I chose the starboard hose because it was longer on its horizontal run, and because this would allow the hose to curve more gently around as it worked its way down toward the shaft seal.
Here is the hose, freshly cut:

I removed a portion of hose roughly equal to the width of the exposed fitting, then installed it using the supplied clamps:

Next, the shaft seal hose was installed. Here's a "front" view:

...and here's a "top" view showing how the hose gently curves down toward the shaft seal:

Unfortunately, there was no way to get a camera down under the engine to show the hose connection to the shaft seal's carbon ring. I could barely get a view of it with one eye, and most of the work under there was done "blind" and one-handed. I'm really glad I had the shop tech install the seal. Here's what it looks like by itself:

(The one that Tige uses at the factory looks exactly the same except that it doesn't have the nylon hose nipple. That "dry" version relies on water under the boat to keep the seal lubed and cooled. However, PSS specifically recommends the wet version for boats that go on plane or that can exceed 12 knots, because in these conditions a vacuum develops under the hull around the propshaft which creates an air pocket - thus starving the shaft seal for water. The correct solution is to plumb water to the seal so that no matter what is going on under the hull, the seal always has water.)
Finally, I dewinterized the engine and started it up. When I looked under the hull, the water flowing from the shaft seal was clearly visible:

...and, surprisingly, cool to the touch even after the engine temp went over 100F. I felt the "dump" hoses where PCM recommends the water be taken and they were cool. The other exhaust cooling hoses were nice and warm, so I know water was flowing around properly.
Hopefully this will be the end of the "shaft seal noise" that we experienced last year:
Click here to listen
Hope this helps someone... thanks!

Comment