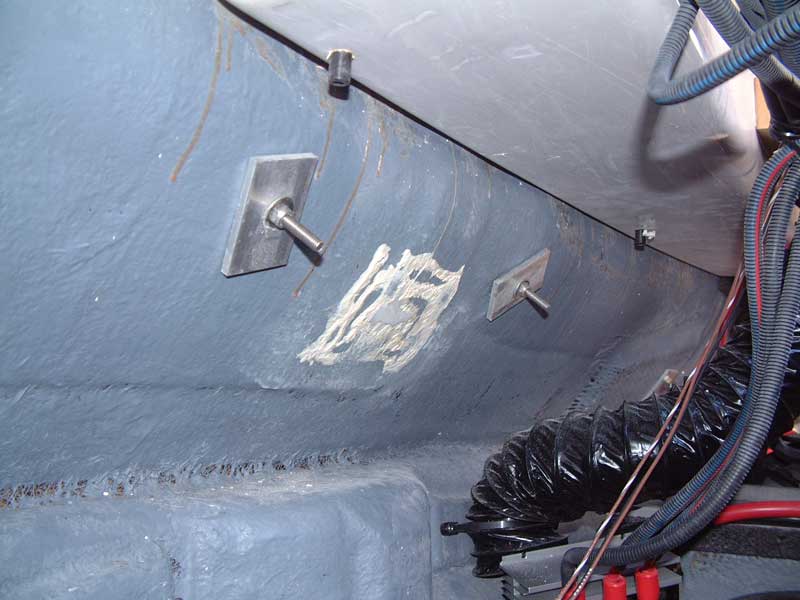
Great news! I was able to remove the existing Starboard. The adhesive wasn't nearly as strong as I expected and it popped right off without too much effort. The remaining adhesive was uneven so I used a sanding block to level things out a bit.

In the photo above, there is a slanted surface just below where the battery isolator used to sit. Putting the isolator there would move it out of the way of the studs on an integrated grab handle/tow ring, while still being well within reach of the existing cables. It would also change the support for the isolator from "hanging from above" to "supported from below", an improvement for this relatively heavy device.
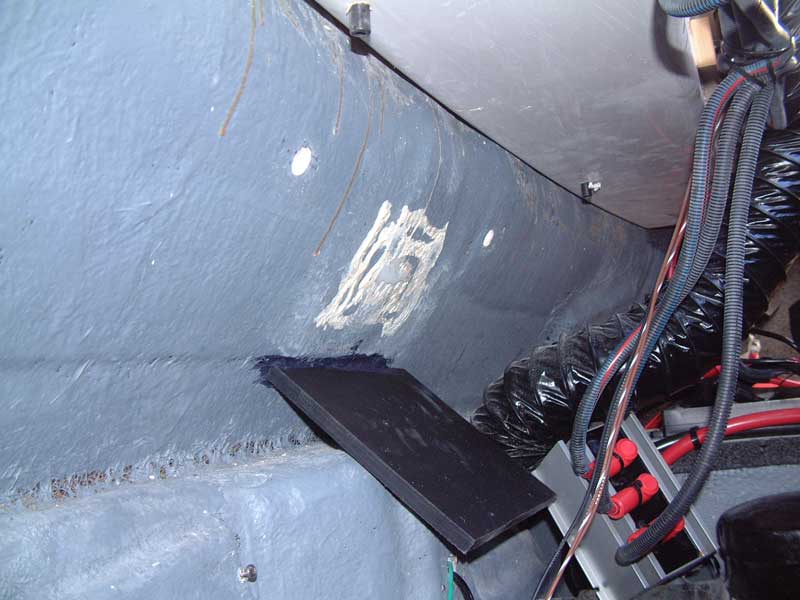
To accomplish that, I first cut a new piece of Starboard large enough to hold the isolator while spacing it away from the transom. This eases access to the isolator's topmost mounting screws and centers the weight of the isolator over that sloped surface. I then tapped the holes for the isolator's mounting screws, since this area will not be easy to reach when it comes time to actually mount the isolator to its new support.
After roughing up and cleaning the mounting surfaces, I mixed up some fiber-reinforced epoxy and affixed the new Starboard mounting plate to the transom, both on the angled surface and along the top edge.

That's where things sit at the moment. Once the epoxy has cured, I'll mount the isolator to the new Starboard - leaving the area behind the grab handle completely open for studs and backing plates.
More updates as this particular project proceeds... thanks!

In the photo above, there is a slanted surface just below where the battery isolator used to sit. Putting the isolator there would move it out of the way of the studs on an integrated grab handle/tow ring, while still being well within reach of the existing cables. It would also change the support for the isolator from "hanging from above" to "supported from below", an improvement for this relatively heavy device.
To accomplish that, I first cut a new piece of Starboard large enough to hold the isolator while spacing it away from the transom. This eases access to the isolator's topmost mounting screws and centers the weight of the isolator over that sloped surface. I then tapped the holes for the isolator's mounting screws, since this area will not be easy to reach when it comes time to actually mount the isolator to its new support.
After roughing up and cleaning the mounting surfaces, I mixed up some fiber-reinforced epoxy and affixed the new Starboard mounting plate to the transom, both on the angled surface and along the top edge.

That's where things sit at the moment. Once the epoxy has cured, I'll mount the isolator to the new Starboard - leaving the area behind the grab handle completely open for studs and backing plates.
More updates as this particular project proceeds... thanks!


Comment